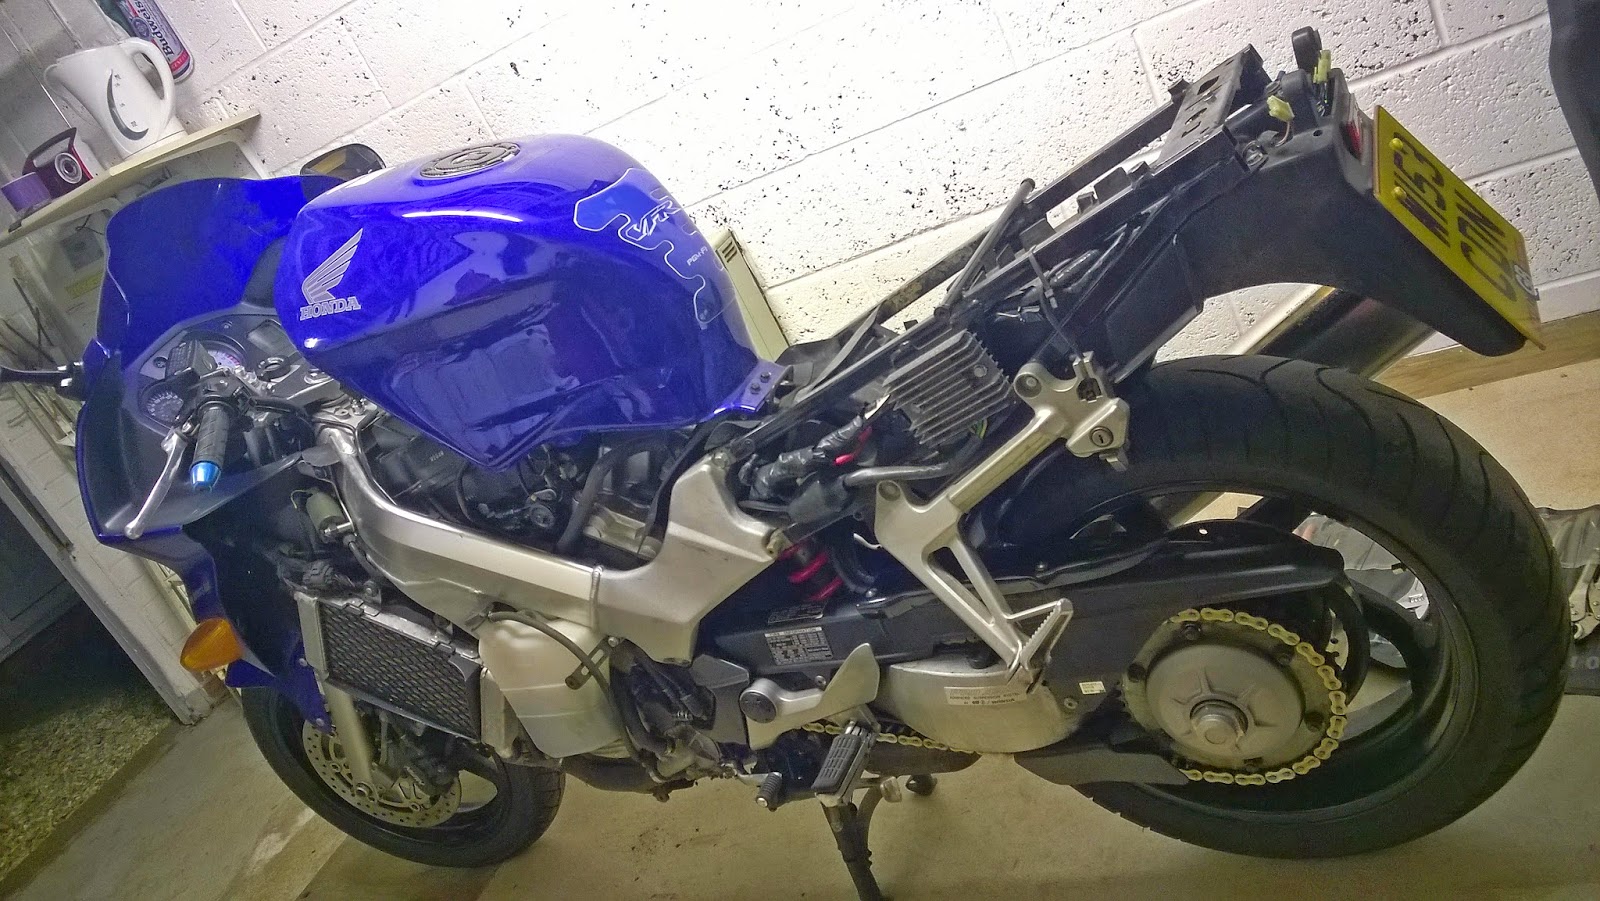
Lets get naked
After that little rodent issue I was keen to have a good look around the VFR to see how everything was under there. Images of chewed wires and hoses were in my mind and as yet I hadn't found the culprit so was expecting to find a cooked mouse somewhere.
All of the fasteners are hex driven stainless into steel captive nuts or rubberized plugs for the forward fairing. That means they were relatively corrosion free and came off easily bar one rubber plug that had become brittle and required replacing (always worth having a few of these in the draw as they regularly fail).
As there was no hand rail the seat unit came off quickly with the light unit in place (just needs unplugging from the loom.The inner front fairing is held in by quarter turn plastic clips that you should remove first as they can be a pain if under strain. The top of this fairing clips into the nose fairing inner fairing so be careful not to snap this when removing it (it is pretty durable though). The forward fairing can be removed as one big piece leaving those terrible plastic clips in place holding the left and right side together. I have no idea why they are different to the front inner fairing but they are, and they are crap. Finally I lifted the tank and the bike was as you see above.
I didn't find a great deal as it happened. What ever had bean living in my airbox had thankfully been dining elsewhere. There was a damaged wire due to rubbing on the inside of the frame that I retaped to become a problem another day. The corrosion was much as I expected for a bike that had been standing so I expected future problems with fasteners although I was surprised to find all of the bearings were all serviceable.
Whilst I was there I took a tin of degreaser to the rear swing arm that appeared to have a lifes supply of chain lube on it. I did the same for the gold plated DID chain bringing it back up to a good shine. Then relubed the chain with Wurth dry chain lube.
Incidentally, if you weren't aware: The Pro arm swing arm allows for rapid wheel changes. This was developed for the Le'mans 24hr race, however Honda in their infinite wisdom stuck the exhaust on the right. 1 covering up the "woo look no swing arm" side of the wheel and secondly, getting right in the way of wheel removal. All you need to do is loosen the link pipe, remove the hangar bolt and rotate the exhaust out of the way to saving your exhaust gasket. Then to remove the wheel you take off the 4 bots like on a car and remove the wheel. All done without the need to adjust the chain. Oh and the rubber bit in the middle of the wheel doesn't need removing so don't!
Whilst I was there and had the tank up I removed the airbox snorkel and disconnected the flapper valve hose, plugging it with a bolt and a tie wrap. I wasn't expecting much change but it wasn't going to hurt and I'm all for a bit more induction noise!
With the job done I put everything back together fully cleaned inside and out. All fasteners had a light coat of copper slip on the threads to make future disassembly easier.


.jpg)

Comments
Post a Comment