Taking [Head] Stock
When I firsts purchased the VFR it had a carbon effect cover on the headstoch which looked okay.
I however do not like "Carbon effect" and it was a little dog eared so I removed it.
This left the standard silver headstock that was showing every day of its age.
This had to go

Jobs like painting your headstock do take a while to come into effect and it is only now that I decided to give it a go.
To get to the headstock I had to:
- Remove the clutch and brake reservoirs from the clipons.
- Remove the clipons.
- Remove the HISS system.
- Remove the instrument cluster fairing.
- Partially remove the instrument cluster.
- Unplug the ignition and free the loom from its tie wrap under the instrument cluster.
- Partially remove my knuckles doing so.
- Undoo the headstock nut.
- Withdraw the headstock with the aid of a hide face hammer.


Having successfully killed an hour or two doing that I now had my headstock free.
First things first; I cleaned everything meticulously.
I masked off all of the areas I did not want painting then hung the headstock up using some welding rod.
I painted the headstock in layers using some mat black spray paint from Halfords. I have always liked the black headstocks on later Honda's and wanted mine to be the same.
In between layers drying I cleaned up all of the components I intended to refit.I also had a damaged thread on the fwd fairing that needed refitting. The brass threads are held in with friction but the plastic had worn away at some point so I reset it with some polyurethane 2 part adhesive.
All of the little jobs in between painting worked my timings great leaving a good surface finish once dry.
Having removed the masking tape I rebuilt the bike in reverse order taking care not to apply too much pressure on the freshly painted headstock.
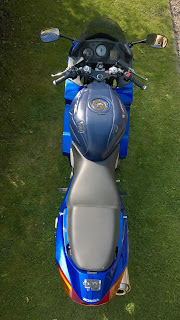
The results were totally worth my efforts:


Comments
Post a Comment