Pipe dreams
Pipe Dreams
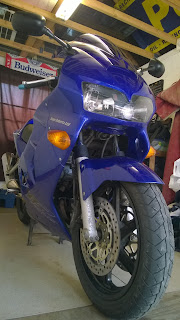
One down side of the mighty Viffer is that due to some boring laws, Honda had to muffle her voice rather more than I'd like.
A new can is the obvious answer to this with the added bonus of additional ponies, maybe. Having recently looked at the exhaust system as a whole, I was also in the market for a new system as the old one looked a little suspect in some places. The cost of a system is not cheap. In addition to this I wanted stainless which would make it a bit more and it's for a V4 remember, so that is not going to be a cheap stainless steel octopus I was looking to buy.
Well you might think that but as it happens a top individual posted up a Motad stainless system for a VFR800 with no pictures or further description so with me as the only person daft enough to bid, I won it for £149. Bargain!
As you probably expected, I went to my trusted motorcycle pats specialist; eBay. I was however in need of the end can bit and annoyingly other people had the same idea so I had to change tact a little.
I picked up a stainless link pipe for £7.50 then searched for cans without motorcycle names in their description. As it turns out there were hundreds and no bugger buys them so I went for a Yoshimura RS-3 carbon can as they are just plain cool for the princely sum of £50.
The can and link pipe needed some accessories to finish the system and my first mistake was buying a strap that was to small. So I went to B&C Express which is just down the road from me. After a little hunting around the warehouse they sorted me out with a strap and two exhaust springs for £20 and I was set.
Removal
Removing the old exhaust is a simple matter of removing the front fairings followed by the end can (one bolt on the can and a clamp on the link pipe), remove the rear brake heat shield (2 bolts), disconnect 8 header pipe nuts and the collector box nut and bolt. Of course don't forget to remove or disconnect the Lambda sensors before you drop the system.
Easy!
Naaaaaa. When is it ever easy?
Naaaaaa. When is it ever easy?
 The can came off without any bother and so did the fairings as I had only removed them weeks before (mmm copper slip).
 I had been softening the built up corrosion and road crud on the front header pipes for a while anticipating emotional things. I wasn't wrong but they did all come off, some with the stud still fused to them and one with half a stud. Aaaaa cock, I guess I'll be extracting that later then.
That initial setback briefly ignored I struggled to free the exhaust system before spotting that cheeky nut and bolt on the collector box attaching it to that lovely exposed spot by the center stand.
I wasted no time in finding a variety of ways to round the fasteners off before deciding to just cut the damn nut off. A Dremel (yer that budget off brand thing I on with batteries that last 30 seconds) was used to grind it off then some gentle use of a hammer and some mole grips freed up that nuts grip on the bolt. The bolt was then freed with a GS and a hammer.
Engineering at its best!
The system is basically free now. The Lambda sensors were more than likely "in there" and I had no use for them so I just unplugged them from the loom and left them in the exhaust system.
Time to fit new shiny shiny!
Install
A simple matter of doing what you just did but backwards, with new bits and less hammers.
Believe it or not the Motad system went on with no major arguments. They will have to come off again to replace that stud that came off in my hand later though. To make life easy I coated all bolts, studs, header pipe mating surfaces and the brass packing that goes between the header pipes and exhaust ports with copper slip. This was to help future maintenance, with sealing and to help hold the gaskets in place during fitting.
Fabrication and install of an exhaust hangar bracket came next. I had some off cuts of aluminium sheet that I used to make a simple hangar for the end can. To make life easier I used the pillion foot peg hangar as a template then drilled and shaped the sheet metal accordingly. Once it was all done I tidied up the edges, rounded the corners and polished the whole thing so it looks smart. I'll be sure to stick a picture of it on here when I get a chance.
Not all end cans are created equally and that goes for the Yoshy can I had bought. I already knew the boar was bigger on the can compared to the like pipe so now I had to beef my link pipe up so it could get a tight seal on the can. I had looked into some pipe expanders and saw some people had some success using them with impact drivers but on the whole all they seem to do is make a pipe correctly round before they run out of expanding power. What I needed was a hydraulic pipe expander and they are a bit specialist, So in future I will be sending this link pipe off for modification but for now I wanted to throw this thing together. On the OEM end can they use a crush gasket on the collector box to get it to match the link pipe so I decided to do the same with trusty speed tape. I built up the link pipe so the can was a tight fit then coated it in copper grease to help the fit and sealing.
This just left me to stick the can on with the two exhaust springs and keep it supported with the strap. I later bought a rubber cushion for the strap so the can doesn't get scratched, from eBay. All looking pretty smart!λ
 The Motad system has the Lambda sensor ports plugged so I was going to need to let my PGM-FI unit (The bikes electronic control unit (ECU)) know what was going on in the exhaust some how.
The Lambda sensors (called air sensors in some literature for the VFR800) put a resistance across a circuit to let the ECU know how rich the bike is running. So all I needed to do is place a resistor in the circuit to give a false reading to the ECU so it thinks all is well at the sooty end.
Luckily for me Dyno Jet have already tackled this problem. As their inline power commanders change the fuel air mixture, the lambda sensors would pick up the richer mixture and cause the PGM-FI unit to reduce the fuel scheduling so canceling out the power commanders input. They get round this with resistor caps that just plug into the plugs that normally go to the lambda sensors. All they are is a 330 Ohm resistor in a plug so my cheapskate way to do the same thing was to pick up some resistors form Maplin and tape over the end. If you try this make sure you put the resistors in the correct ports of the plug opposite the clip and leave the other pins empty.
This modification was to cause a bit of a problem later, the sharp eyed of you might be able to spot it but that is for another day.
This modification was to cause a bit of a problem later, the sharp eyed of you might be able to spot it but that is for another day.
...Oh go on then went and took a picture in the end.


.jpg)

Comments
Post a Comment